Sarah J Duncan architectural photography

Sarah J Duncan sarahjduncan photography

Follow @sarahjaneduncan

  • "Behind the Scenes at the Museum"

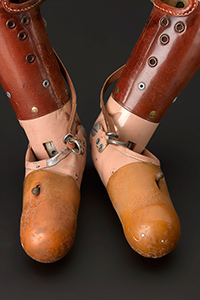
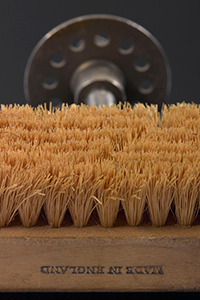
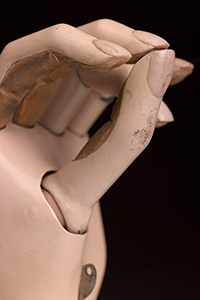
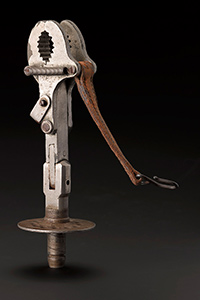
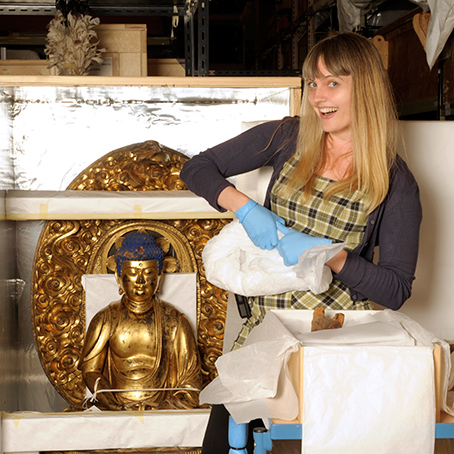
    Around six months ago I began working at The Horniman Museum and Gardens in Forest Hill in London. After 5 years at the Science Museum in a similar role I felt I needed a change of environment and collections as well as a more varied role. At the Science Museum I was one of a team of 5 photographers, at the Horniman I am the only one. As a result of being the only photographer my role is much more varied. The majority of my time is still dedicated to object photography; photographing the collection for loans, publication, displays and collections online. As well as this I am able to photograph events, gallery installs and the building and gardens. I also have the opportunity to photograph members of staff. It soon became clear that people were far happier to be photographed in their environment than against a white backdrop. And so my work began.....

    Laura CroninCarly RandallKatrina MadeleyRory Smith

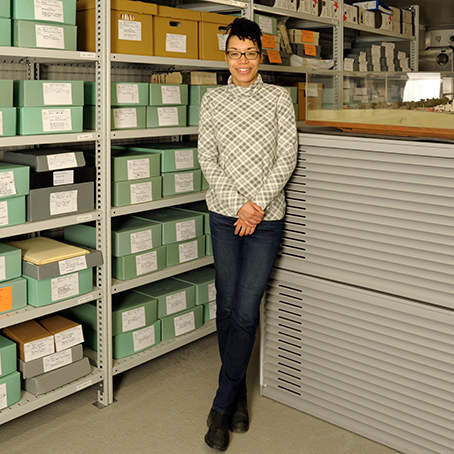
    We each have a desk in the museum but as anyone who works in museums will know, a vast amount of our time is spent on our feet, elsewhere. It is this that I wanted to capture in these pictures. I first asked if my sitters had a favourite object, job, skill or interest in the collection. From this initial question I could then work with each person to tell their story.

    Adrian HollowayHenry Rowsell

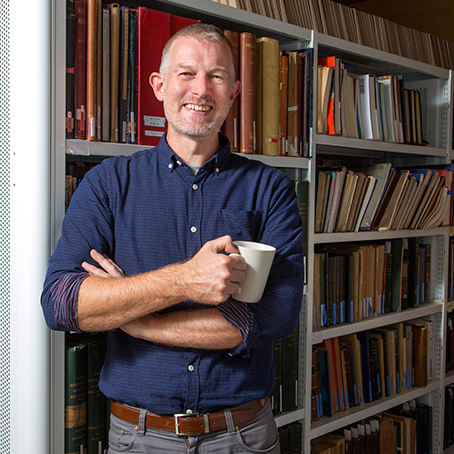
    Each portrait took about 30 minutes to acheive. 10 minutes to set up my camera and lighting, 10 minutes with the sitter and then 10 minutes to break down.

    Emma NichollsHelen MerrettSarah SinkaRosamund West

    I am working on a project to expand the scope of these portraits to tell more in depth stories of the people behind the scenes in the museum, their roles and what their jobs entail. Hopefully, with Museum backing these will be online in the near future.

    For more information on The Horniman Museum and Gardens please click here.

    Click here to view more examples of my work

  • Tips on Photographing Small Spaces

    I am often asked to photograph small spaces, compact flats, boat interiors and offices. There are tips and tricks that a photographer uses in order to solve problems of space and light in these restricted areas. Done well they can work to a photographers advantage, done badly they kill the mood and feel of the interior. Wide-angle lenses certainly have their uses, they can make a cramped room look spacious and palatial. When using a wide angle lens make sure you lower the tripod to well below eye level to get more of the furniture and floor and less of the ceiling. I use my 17mm or 24mm shift lenses to avoid this step and retain straight verticals. Don't get too low though or you will create an uncomfortable image. Tether your camera to the laptop so you can place the camera flush with the wall to get maximum angle of view.

    There are issues with using wide angles, don't overdo it! Remember details are interesting too. Always make sure you correct lens distortion in Photoshop. Really wide angles can look too obvious, make sure the view lends itself to the lens you have chosen and finally try to choose a strong angle of view or shoot perfectly straight on to the room.

    Tiger HouseTiger HouseTiger House

    Another trick would be to move furniture. It sounds simple but a busy cluttered room will make a busy cluttered photograph. Unless this is the look you are going for don't be afraid to move items. Furniture can also be used to hide defects and cover up utilities. Always remember to put everything back!

    Tiger HouseTiger HouseTiger House

    Add light or add the illusion of light. Eyes see a vast range of light levels, cameras don't. While being mindful of the effect you are trying to create you can use a few simple tricks to lighten up your interior photography.

    Photograph interiors on an overcast day or photograph near dawn or dusk when sunlight levels are lower. Make sure you retain some detail in the exterior, a window that is too dark can look sinister. Add light, turn on all available lamps and lights in adjoining rooms too. Bring your own floodlights, hide them behind furniture but don't overdo it. Use flash, again make sure they are balanced, avoid reflections in windows and always bounce the flash, reflectors and incredibly handy in small spaces.

    Tiger House

    Use HDR or High Dynamic Range. Take multiple shots at different exposures and composite them later. Again, use this tool lightly, as too much shadow and highlight detail can look unreal.

    Click here to view more examples of my work

  • "Interiors for Sale"

    It's one of the joys of my job that I get to work for a range of clients from architects to property developers to interior designers and artists. Each has their specific needs with regard to the photography they commission. One of my clients, a property developer called Pocket Living, recently asked me to photograph a number of their new build, affordable Pocket homes.

    Sail StreetSail StreetSail Street

    Pocket Living describe themselves as ... "A new type of developer .. (they) sell well designed, local homes, with their affordable Pocket homes priced at 20% cheaper than the surrounding market rate. Their apartments make the best possible use of good quality but not extravagant materials. They work closely with local authorities to free up urban sites" ...

    Sail StreetSail StreetSail Street

    Pocket flats have very similar interior layouts and so I'm only asked to photograph interiors for them when the show flat is relocated or redressed. Once the flats are built, Birdy Design's Kelly Parfitt is given a new brief from which she works on ideas for presentation of the show flat. Kelly has some great contacts in the industry and always manages to come up with unusual and quirky objects, lighting and prints on a budget to make these spaces feel like home.

    Sail StreetSail Street Sail Street

    Kelly uses interior design techniques such as glass coffee tables and sloping shelves to give the flats an even greater sense of space. It is important for me to bring together these elements and to photograph them in a way that shows the rooms as the bright, airy spaces they are.

    Sail StreetSail StreetSail Street

    As well as the wide angle room shots which give a sense of size, layout, and overall feel of the interiors, I also need to give the client close up details that they can use in brochures, websites and social media. Again, bright, clean and punchy details work well to draw the viewer into the image, capture their imagination and appeal to their aspirations as first time homeowners in London .

    "We continue to be thrilled with Sarah's photography of our show flat interiors and new build exteriors. Each of our buildings are uniquely designed and the extensive bank of images Sarah produces capture every detail. Having great quality, up to date photography is really important to us and so it's great we can rely on Sarah to work fast and flexibly from start to finish." Romy Levin, Marketing Executive at Pocket Living

    For more information on Pocket Living please click here.

    and for Kelly Parfitt click here.

    Click here to view more examples of my work

  • Photographing Human Remains

    As a photographer at the Science Museum I work with a vast array of objects from within the collection. In early January a loan out request was made for photography of human specimens in the form of tattooed skin. Restricted access, as well as the requirement for museums to have a public display license for human remains, means that requests like these are really rare. The nature of the object, its preservation techniques and its classification as a bio-hazard all meant that this was going to be no ordinary afternoon in the studio. These tattoos are part of the Wellcome Collection, and are the largest collection of human skins in the world, numbering over 300 individual tattoo fragments, all dating from the 19th century. The preserved skins in the collection were purchased from a single 'mysterious' individual. The seller called himself Dr La Valette, but there was no registered medical professional by that name at that time. In all likelihood the name was a pseudonym, the ‘Doctor’ would have been wary of revealing his true identity for a couple of reasons;

    A scandal surrounding the farming and use of tattoos to make souvenir items at a Paris medical facility

    A second scandal at the time surrounding the experimental removal of tattoos from inmates of the La Sante prison in Paris.

    Collecting the tattoos from the storesThe tattoo in its box

    “… whilst today the focus is often on the artistic value or iconography of tattoos, during the time when they were being collected , scholars were more interested in deciphering their meaning, and trying to establish a taxonomy of symbols that could tell them something about the individual’s usually ‘criminal’ psychology”. (1). In the 1920s, when these tattoos were acquired by the Wellcome Collection many scholars believed that tattoos represented worrying signs of criminal proclivity and degeneration within the European population.

    Using the extractor unit to remove fumesPlacing the tattoo in shot

    The collection of these tattoos would have been done during autopsy as skin decomposes very quickly. In most cases the skin would have been cut away from the cadaver using a scalpel, a quick and simple process in itself. The tattoos would have been preserved using a dry preservation method. The skin would be scraped on the reverse to remove connective tissue and then pinned out to dry. The characteristic ‘frilling’, that we can see, around the edges occurs when the skin shrinks during the drying process. Once dry the skin would be treated using glycerin or formalin alcohol. These preservation processes mean that extreme care needs to be taken when handling the tattoos. As with all object photography protective gloves must be worn. I also needed to wear a face mask to limit the inhalation of toxic chemicals used in skin preservation.

    Moving the tattooLast minute changes

    I collected the tattoos from their storage cabinets and moved them in a sealed corex box to the studio here at Blythe House. I had already installed a heavy duty portable extractor fan in the studio which sucked the fumes away. To limit the time the tattoos were exposed to the air I set up my lighting using a dummy object of roughly the same size and tonal range. I used small sections of inert foam to prop the tattoos up from the matt grey background which I curved on the shooting table to create a mini cove. This raising of the skin meant I was able to create a drop shadow around the front of the tattoo to make a more pleasing 3D image. I also used the soft fall off of the lighting levels to create a background which faded to deep black in the distance, a technique I often use to emphasise depth in an image. Using the Mamiya and 120mm lens I shot several exposures of each in order to focus stack them afterwards in Photoshop.

    Tattoo 01Tattoo 02Tattoo 03

    The resulting images show the depth and clarity of the tattoos, fine detail, including hairs on the skin and the intricate work involved in them.

    The three tattoos are off to the National Maritime Museum in Cornwall. For more information on The National Maritime Museum Tattoo Exhibition please click here.

    All in all, a successful afternoon!

    (1). Dr. Gemma Angel, Tattoo historian and anthropologist.

    Thank you to Kevin Percival for taking the editorial shots that accompany this article. Click here to see some of his work.

    Click here to view more examples of my work

  • Photographing in the freezer at -28° C

    I certainly have a very varied and interesting life as a photographer. It’s true that no two days are the same. I’m sure it’s this that helps to ensure that I wake up every day excited and interested about the challenges ahead.

    Distribution CentreDistribution CentreDistribution Centre

    One of my clients is a well-known Supermarket, who have been expanding hugely in this country over the past few years. All this building means I'm kept busy photographing for them. Among their requests are distribution centres.

    If you’ve never been to a distribution centre then its difficult to imagine the sheer scale of them. To put it into context, it usually takes about two hours to walk the site before I even get my camera out. The whole site feels bigger than the town I grew up in and an average day of photography clocks up a staggering 30,000 steps!!!!

    The challenge comes with the variety of conditions you come across inside these colossal superstructures. And it is one of these that I’d like to share here. Photographing inside their vast freezers. 

    Distribution CentreDistribution CentreDistribution Centre

    COLD, Oh yes, its cold! Colder than I could ever have imagined…  Where to begin? What would be my working method? How was I going to tackle the extreme temperatures?  How many people photograph in freezers? 

    Not many as I found out. Its quite specialized and requires more involved planning and preparation than any other day of architectural photography. So, I asked myself, who shoots at extreme temperatures?... I thought about wildlife photographers and film-makers at the Poles. The average Arctic winter temperature is -34° C. I had my answer - just do what they do and I’d be fine!

     As a result of my research I came up with...

    10 steps to survival of both you and your camera. (I know it's sounds a bit extreme, but at least it's catchy!)

    1. Have a large supply of silica gel, re-conditioned in the oven to dry it out as much as possible. Advice on re- conditioning the gel was thanks to the conservation department at The Science Museum... thanks girls! Place this (in its packets) in a fully sealable plastic bag and have it ready for when you emerge from the freezer.

    2. Only ever take your back-up camera in to the freezer. I had a friend Rob, who is sadly no longer with us, who always used to say, “Have a back-up of your back up!” That advice has certainly got me out of a few scrapes over the years. I'd need to be able to carry on shooting once I came out of the freezer so could only afford to take in equipment I didn't need again for a few days.

    Distribution CentreDistribution CentreDistribution CentreDistribution Centre

    3. Wrap up very warm – This is a given, its not glamorous but I’d rather be warm that gorgeous!! 

    Distribution CentreIn Warm GearDistribution Centre

    4. Have a plan and stick to it. Go in to the freezer, work out your angles, shots etc. prior to going in with the camera. Prior knowledge of a site always saves valuable time later.

    5. Cable releases or remotes don’t work at -28 ° C….. My cable release froze solid on my first assignment in a freezer  and I had to take gloves off to take the shots. I advise putting them straight back on again afterwards! Set the camera on self-timer as this will avoid camera shake for those inevitable long exposures.

    6. I had a maximum of 30 minutes in the freezer, it goes fast so work methodically. Movement sensitive lighting can be a pain but make sure all your lighting is on, the walk around in the freezer will help to keep you warm.

    7. Don’t get distracted. This time I was in the freezer I lost feeling in my fingers on both hands and had mild euphoria, and that was after just 20 minutes. I was on my own but had informed staff on site where I was and agreed to report back to them on completion of my photos. In this case the best thing to do is leave equipment in the freezer, come out for a few minutes to warm up then go back in to finish your shots.

    My CameraMy Camera in a BagMy Camera in Silica Gel

    8. Once you have your shots, come out. Separate your lens from camera, make sure you put Len's caps etc on and place quickly in the prepared bag of silica gel packets. Add rice too, this also works really well as a desiccant. (I once saved an wet iPhone using the same method).

    9. Leave your camera and lens in this bag for as long as possible (at least 48 hours but longer if you can).

    10. Have a warm cup of tea…. Like to toast they give you after childbirth, nothing tastes better!

    Click here to view more examples of my work

  • Rochester Station for Atkins Global

    Last week saw me hopping onto a train to Kent in order to photograph Rochester Station for Atkins. It was a rare treat to hop off the train at my destination and start photographing straight away (baring a few formalities of signing in and familiarisation).

    Rochester StationRochester StationRochester StationRochester Station

    I initially thought that my tripod, camera and I would be a hindrance to the daily commute of many, I couldn't have been more wrong... Everyone was really friendly and eager to know what I was doing.

    Rochester StationRochester StationRochester Station Rochester Station

    Many people asked what camera I used, and what were the strange looking lenses attached to it. I showed them my various shift lenses, and explained how they worked. They work by raising the lens parallel to the images sensor to give the equivalent of view camera movements. Most went away happy to have learnt a little something while they waited for their train - all of which, incidently, were all running late due to an earlier accident involving a lorry and a level crossing.

    Click for more info on tilt-shift phtography

    Rochester StationRochester StationRochester Station

    A great day of photography coupled with the knowkledge that I had helped a few people pass some time.

    Click here to view more examples of my work

    Click for more info on Atkins

  • A Very Small Part of Architecture

    On Tuesday I had the good fortune to be commissioned by the Architecture Foundation to photograph a specially-commissioned temporary tomb, designed by Sam Jacob studio, it's entitled "A Very Small Part of Architecure". A Very Small Part of Architecture resurrects Austrian Modernist architect Adolf Loos’s 1921 design for a mausoleum for art historian Max Dvorák. It takes it's title from Loos' essay of 1910 in which he argues that "Only a very small part of architecture belongs to the realm of art: The Tomb and the Monument".

    A Very Small Part of ArchitectureA Very Small Part of ArchitectureA Very Small Part of Architecture

    Loos original form was recreated at a 1:1 scale using a lightweight timber frame and scaffolding net. "A ghostly reenactment of an unrealised architectural idea".

    A Very Small Part of ArchitectureA Very Small Part of ArchitectureA Very Small Part of Architecture

    It's location in Highgate West Cemetery , among so many memorials to the dead, encourages us to question ideas surrounding memories of the past; our honouring the dead; and the possiblity of over-saturation now and in the future.

    A Very Small Part of ArchitectureA Very Small Part of ArchitectureA Very Small Part of Architecture

    These are a selection of images from that evening.

    Click here to view more examples of my work

    Click for more info on The Architecture Foundation

  • Steeper Prosthetics

    For nearly 100 years Steeper have produced innovative prosthetic, orthonic and assistive technology products. I've spent the last week photographing some early examples of Steeper upper extremity prosthetics while working on a project to digitise part of the Science Museum Orthopaedics collection.

    Pair of prosthetic arms for a child, 1959One piece adult arm, 1965Pair of CO2 powered arms for a child, 1973Heavy duty arm for an adult male, 1928

    The collection dates from the 1920s to the 1990s and includes electric, mechanical and passive examples as well as functional devices, made for occupational, educational and social activities.

    What struck me when working with this collection was the work that has gone into making these devices through generations of perseverance and development. We can see moves from providing patients with limbs to providing them with function.

    Left upper limb for a child, 1972Left below elbow prosthesis, 1994Wooden nail brush screwed to stem, 1998Mechanical hand, 1939

    One major difference between the prosthetic limbs in these photographs to those used today is the use of newer materials including advanced plastics and carbon fiber composites. These materials mean that the limb can be lighter, stronger and more realistic.

    Electronic technologies make today’s advanced prosthetics more controllable. While materials and technology have modernized prosthetics over the past 100 years the basic components remain the same.

    Steeper right cosmetic foam hand, 1983One-off special tool-holder, 1955Swedish myo-electric hand, 1978Spade grip with domed adaptor, 1998

    Please enjoy taking a look at some of the images.

    All images are available on the Science and Society website. Shown here are twelve images from a set of 52, all images reproduced here are with their kind permission. Click for more info

    Click here to view more examples of my work

    All images © Science Museum, London
    Sarah or call 07753841570